Helsinki #2
Helsinkiまとめ
1日目
15時ヘルシンキ空港着
空港で、一杯
 |
| From October 3, 2011 |
17時ヘルシンキ市街着
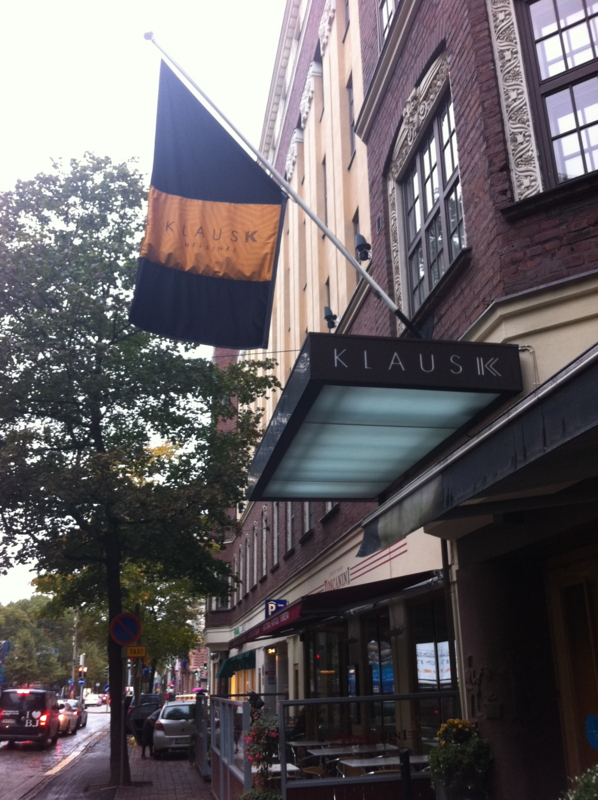
Klaus K Hotelにチェックイン後、周辺ぶらぶら
バーで飲んで帰る
 |
| From October 3, 2011 |
2日目
急に寒くなった。一応、コートを着て
ワルプルギスの夜を祝うらしいKaivopuistoに行く。
 |
| From October 3, 2011 |
 |
| From October 3, 2011 |
途中でかもめ食堂発見。普段は、日本食ではなくフィンランドの郷土料理を出すレストランの様です。マダムは不在。
 |
| From October 3, 2011 |
セントラル方面に戻って、国立現代美術館キアズマ見学。入り口のスロープは生で見ると結構感動。キアズマのバッグとプリントデザインの資料集ゲット!(目的30%達成)
 |
| From October 3, 2011 |
 |
| From October 3, 2011 |
 |
| From October 3, 2011 |
マーケットでお昼。ここでの食事は常にかもめから狙われる。
市街地に戻ってDesign Districtを探索。(目的50%達成)
 |
| From October 3, 2011 |
Ulla Jokisaloの写真集(その他2冊)ゲット!!(目的80%達成)
 |
| From October 3, 2011 |
Helsinki中心を一周しても、距離感的には渋谷・原宿を回っている感じです。
3日目
朝一、地下鉄でKaapeliに向かう。
ヘルシンキセントラルから2つ目の駅Ruoholahti下車。
駅を降りると、目の前にNokia本社。
 |
| From October 3, 2011 |
元Nokia工場だった建物らしく、でかい!
建物内の各ブロック内に作業場と展示スペースがある。
中は見れなかったけれど、劇場も何件かある模様。
雰囲気としては、横浜のBankArt NYCや、お店が入ってくる前の赤レンガ倉庫の様な感じ。
 |
| From October 3, 2011 |
 |
| From October 3, 2011 |
 |
| From October 3, 2011 |
 |
| From October 3, 2011 |
併設されている写真美術館、舞台美術館、レストラン美術館見学。
トラムでARABIA工場へ向かう。Aalto大学の芸術学部が入っているらしいので見学したかったけど土曜で(?)入れず。
 |
| From October 3, 2011 |
セントラルに戻りHelsingin kaupungin taidemuseo(市立美術館)見学。
 |
| From October 3, 2011 |
ガッチャマンが歌われたアカデミア書店。カフェ・アアルトは満席で入れず・・・
比較的大型の書店ではあるけど、日本の書店に慣れていると「すげー!」という感じは無いかも。と言いつつ、オリジナルのトートバックと画集2冊ゲット!!フィンランドのアーティストで1コーナーあるので便利。
 |
| From October 3, 2011 |
Marimekkoでセールをやっていたので、お買い物。他の店舗も寄ったりしていたのですがMarimekkoは日本人の方との遭遇率が高いので気まずい。
暇になったので、またDesign Districtぶらぶら。
夕飯はフィンランド料理を食べようとしましたが、閉まっていて面倒くさくなりネパール料理を食べました。
4日目
日曜のため、観光しても微妙そうなので昼ごろに空港着
Mobile Boarding Passを使ってみたのですが、意外とめんどくさい。パスポートに件を挟んでおける方が楽な様な・・・
帰国→荷物を送って、そのまま出社:-)
雑感
- フィンランドは初めてだったので、歩きまわりたいと思いトラム、地下鉄はそれぞれ1回しか乗らなかったのですが、市街地を回るのであれば1日半位で充分な規模。
- 駅前など、人は多いけど異様に静かに感じた。
- 街中にある、小さなオフィスの会社ロゴが異様にかっこいいものが多い。看板も凝ってる。
- 町を歩いていても「フィンランドデザイン!」みたいなものは特別感じなかった。Design Districtもギャラリー、ショップなどが集中しているけど、それほど活気があるわけでもなさそう。が、逆に「このくらい普通っしょ」的にデザインが根付いている感じ。(自分フィルターがかかっているのと、シンプルだけどインパクトがあるMarimekkoのイメージが強いせいだと思いますが。。。)
- 今回行った美術館全てで小学生、高校生位の団体が館内で見学授業していたので「いいなー」とか思いながら見てました。
- 「Marimekko = 小さなマリーのためのドレス(mekko)」と聞いて感動した。
- 外食費が高い!
 |
| From October 3, 2011 |
Helsinki #1
iOS 4 SDK for JavaScript Programmers #1

Learning the iOS 4 SDK for JavaScript Programmers
- 作者: Danny Goodman
- 出版社/メーカー: Oreilly & Associates Inc
- 発売日: 2010/12/15
- メディア: ペーパーバック
- クリック: 3回
- この商品を含むブログ (1件) を見る
対象読者的にドンピシャぽいので、これでiOSプログラミングの勉強しようかと思います。
とりあえず一日目は目次読み込み。
TOC
1. Why Go Native?
・ネイティブアプリで作る理由と注意点
2. Welcome to the iOS SDK
iOS SDK一巡り
・開発環境/インストール/Developer Programs/ドキュメント/コードサンプルの実行/iOSシミュレータ
3. Creating a Test Workbench
・XCodeによるプロジェクト作成
・ユーザインターフェースの作成
4. Structural Overview of an iOS App
・API
・フレームワーク
・Classファイル
5. App Execution Flow
・Delegate入門
・iPhoneアプリのデザインパターン
・ビューの重要性
6. Central Objective-C Concepts: Pointers, Data Types, and Memory Management
Objective-Cの中心となるコンセプト
・ポインタ
・データ型
・メモリ管理
7. C Language Fundamentals
・C言語基礎
8. Objective-C/Cocoa Touch Fundamentals
・Objective-C/Cocoa Touch基礎
9. Common JavaScript Tasks in Cocoa Touch
・JavaScriptでよく行う処理をObjective-Cでやってみる
1~3章でネイティブアプリの概要からiOS SDKの説明。
4章から実際にXCodeでアプリを作り始め、5章でそれまで自分が何のコードを書いていたのかを理解する。
6章ではJavaScriptには無いObjective-Cの重要な点。
7,8章でC言語とJavaScriptでの例を交えつつObjective-Cのお勉強。
9章ではJavaScriptで日常的に行なっている処理(数値の整形、配列のソート、非同期でファイル取得など...)をObjective-Cでやって見る。といった内容の様です。
bitbucktからpullする時のwarning
bitbucket.orgにあるレポジトリからpullしようとすると
やたら
warning: bitbucket.org certificate with fingerprint ~~~ not verified (check hostfingerprints or web.cacerts config setting)
と言ってくるときの対処法。(Mac)
認証局CAの設定
Keychain Access.appを開き、[keychains] > [System Roots] + [Category] > [Certificates]を選択。
右のペインのリストをすべて選択して[File] >[Exports Items]を選択し、"Certificates.pem"の様な名前で適当な場所に保存する。
保存したら"/etc/"以下にコピー。
% sudo cp ~/Desktop/Certificates.pem /etc/hg-ca-roots.pem
.hgrcの編集
.hgrcに以下を追加
[web]
cacerts = /etc/hg-ca-roots.pem
確認
% hg pull
http authorization required
realm: Bitbucket.org HTTP
user: USER
password:
pulling from https://repo_url/
searching for changes
no changes found
% ok :-)
Journeyを使ったルーティング
Journey
liberal JSON-only HTTP request routing for node.
createServer
基本的なサーバを作る。
/**
 * server.js
 */
var http = require('http');

http.createServer(function(req, res) {
  req.on('end', function() {
    res.writeHead(200, { 'Content-Type': 'text/plain' });
    res.end('welcome');
  });
}).listen(3000);

console.log('Server running at http://127.0.0.1:3000');
http-consoleで確認。
% http-console http://localhost:3000
> http-console 0.6.0
> Welcome, enter .help if you're lost.
> Connecting to localhost on port 3000.

http://localhost:3000/> GET /
HTTP/1.1 200 OK
Content-Type: text/plain
Connection: close
Transfer-Encoding: chunked

welcome
ルーティングを追加する。
service.js
/**
 * service.js: Define the web service
 */
var journey = require('journey');

exports.createRouter = function() {
  var router = new (journey.Router);

  router.map(function() {
    // GET '/'
    this.root.bind(function(req, res) {
      res.send('welcome.');
    });

    // GET '/hello'
    this.get('/hello').bind(function(req, res) {
      res.send('hello!');
    });

    // POST '/user'
    this.post('/user').bind(function(req, res, params) {
      console.log(params.user);
      res.send(200);
    });

    // GET/POST '/echo'
    this.path('/echo', function() {
      this.get().bind(function(req, res, params) {
        res.send(params);
      });

      this.post().bind(function(req, res, params) {
        console.log(params)
        res.send(200);
      });
    });
  });

  return router;
};
ルートは個別に定義することもできるし、グループ化することもできる。
this.get('/foo').bind(function() { ... });  // GET '/foo'
this.path('/bar', function() {
  this.get().bind(function(req, res) { ... }); // GET '/bar'
  this.get('/baz').bind(function(req, res) { ... }); // GET '/bar/baz'
});
server.js
var http = require('http'),
    service = require('./service');

var router = service.createRouter();

http.createServer(function(req, res) {
  var body = '';

  req.on('data', function(chunk) {
    body += chunk;
  });

  req.on('end', function() {
    router.handle(req, body, function(route) {
      res.writeHead(route.status, route.headers);
      res.end(route.body);
    });
  });
}).listen(3000);

console.log('Server running at http://127.0.0.1:3000');
http-consoleで確認
% http-console http://localhost:3000
> http-console 0.6.0
> Welcome, enter .help if you're lost.
> Connecting to localhost on port 3000.

http://localhost:3000/> GET /
HTTP/1.1 200 OK
Content-Type: application/json
Date: Sat, 09 Apr 2011 04:29:06 GMT
Server: journey/0.4.0
Content-Length: 22
Connection: close

{ journey: 'welcome.' }
http://localhost:3000/> GET /hello
HTTP/1.1 200 OK
Content-Type: application/json
Date: Sat, 09 Apr 2011 04:29:08 GMT
Server: journey/0.4.0
Content-Length: 20
Connection: close

{ journey: 'hello!' }
http://localhost:3000/> GET /user
HTTP/1.1 405 Method Not Allowed
Allow: POST
Date: Sat, 09 Apr 2011 04:29:13 GMT
Server: journey/0.4.0
Content-Length: 31
Connection: close

{ error: 'method not allowed.' }
http://localhost:3000/> POST /user
... { name: 'daigo3' }
HTTP/1.1 200 OK
Date: Sat, 09 Apr 2011 04:29:22 GMT
Server: journey/0.4.0
Connection: close
Transfer-Encoding: chunked

http://localhost:3000/> GET /echo
HTTP/1.1 200 OK
Content-Type: application/json
Date: Sat, 09 Apr 2011 04:29:28 GMT
Server: journey/0.4.0
Content-Length: 2
Connection: close

{}
http://localhost:3000/> GET /echo?q=hi
HTTP/1.1 200 OK
Content-Type: application/json
Date: Sat, 09 Apr 2011 04:29:39 GMT
Server: journey/0.4.0
Content-Length: 10
Connection: close

{ q: 'hi' }
http://localhost:3000/> POST /echo
... { q: 'hello' }
HTTP/1.1 200 OK
Date: Sat, 09 Apr 2011 04:29:54 GMT
Server: journey/0.4.0
Connection: close
Transfer-Encoding: chunked
レスポンスで"Server: journey/0.4.0"となっているのはルートのコールバックが返すres.send()でbodyのみを指定しているため。res.send(status, header, body)の様に引数を渡すと、レスポンスを定義できる。
パラメータの処理
this.get().bind(function(req, res, params) {
  console.log(params);
});
の様にパラメータを取得する方法と、URLをキャプチャする方法がある。
this.get(/^([a-z]+)\/([0-9a-z]+)$/).bind(function(req, res, resource, id, params) {
  res.send({
    resource: resource,
    id: id,
    params: params
  });
});
http://localhost:3000/> GET /books/32?p=1234
HTTP/1.1 200 OK
Content-Type: application/json
Date: Sat, 09 Apr 2011 05:00:05 GMT
Server: journey/0.4.0
Content-Length: 50
Connection: close

{
    resource: 'books',
    id: 32,
    params: { p: '1234' }
}
jQuery x mustache メモ
jquery.mustache.jsを作る
% git clone https://github.com/janl/mustache.js.git
% cd mustache.js/mustache-jquery/
% ls
jquery.mustache.js.tpl.post jquery.mustache.js.tpl.pre
% cat jquery.mustache.js.tpl.pre > jquery.mustache.js
% cat ../mustache.js >> jquery.mustache.js
% cat jquery.mustache.js.tpl.post >> jquery.mustache.js
Hello, World!
$.mustache()にテンプレートとデータを渡す。
<!DOCTYPE html>
<html>
<head>
  <meta charset="UTF-8" />
  <script type="text/javascript" src="jquery-1.5.1.min.js"></script>
  <script type="text/javascript" src="jquery.mustache.js"></script>
</head>
<body>
  <div id="target1">Hello, {{who}}!</div>
  <div id="target2"></div>

<script>
  var view = {
    who: 'world',
    say_hello: function() {
      return 'Hello, ' + this.who;
    }
  };

  var template1 = $('#target1').html();
  $('#target1').html($.mustache(template1, view));

  var template2 = '<div>{{say_hello}}!</div>';
  $('#target2').html($.mustache(template2, view));
</script>

</body>
</html>
条件
{{#foo}} {{/foo}}で囲まれた箇所はビューのメソッドfoo()がtrueの場合にレンダリングされる。
<div id="target">
  {{#condition}}
    condition is {{result}}
  {{/condition}}
</div>

<script>
  var view = {
    result: true,
    condition: function() {
      return this.result;
    }
  };

  var template = $('#target').html();
  $('#target').html($.mustache(template, view));
</script>
foo()がfalseの時にレンダリングさせたい場合には、'#'の代わりに'^'を使う。
<div id="target">
  {{^condition}}
    condition is {{result}}
  {{/condition}}
</div>

<script>
  var view = {
    result: false,
    condition: function() {
      return this.result;
    }
  };

  var template = $('#target').html();
  $('#target').html($.mustache(template, view));
</script>
ループ
条件と同じように{{#foo}~{{/foo}}で囲む。ビューのfooが配列の場合にmustacheがループとして処理してくれる。ループ内では、{{.}}を使って現在のアイテムにアクセスできる。
<div id="target">
  {{#items}}
    {{.}}<br />
  {{/items}}
</div>

<script>
  var view = {
    items: ['Twinkle', 'twinkle', 'little bat!']
  };

  var template = $('#target').html();
  $('#target').html($.mustache(template, view));
</script>
'.'でアクセスするアイテムに名前をつけたい場合には'{{%IMPLICIT-ITERATOR iterator=NAME}}'を使う。
<div id="target">
  {{%IMPLICIT-ITERATOR iterator=item}}
  {{#items}}
    {{item}}<br />
  {{/items}}
</div>

<script>
  var view = {
    items: ['Twinkle', 'twinkle', 'little bat!']
  };

  var template = $('#target').html();
  $('#target').html($.mustache(template, view));
</script>
ビューのネスト
<div id="target">
  {{#plot}}
    <h1>{{title}}</h1>
    {{#lines}}
      <p><span>{{role}}</span>:<span>{{part}}</span></p>
    {{/lines}}
  {{/plot}}
</div>

<script>
  var view = {
    plot: {
      title: 'Alice',
      lines: [
        {
          role: 'Alice',
          part: 'What is the use of a book, without pictures or conversations?'
        },
        {
          role: 'Rabbit',
          part: 'Oh my ears and whiskers, how late it\'s getting!'
        },
        {
          role: 'Alice',
          part: 'Curiouser and curiouser!'
        }
      ]
    }
  };

  var template = $('#target').html();
  $('#target').html($.mustache(template, view));
</script>
<div id="target">
  <h1>Alice</h1>
  <p><span>Alice</span>:<span>What is the use of a book, without pictures or conversations?</span></p>
  <p><span>Rabbit</span>:<span>Oh my ears and whiskers, how late it's getting!</span></p>
  <p><span>Alice</span>:<span>Curiouser and curiouser!</span></p>
</div>


